This post contains affiliate links. An affiliate link means I may earn advertising/referral fees if you make a purchase through my link, without any extra cost to you. It helps to keep this little blog afloat. Thanks for your support!
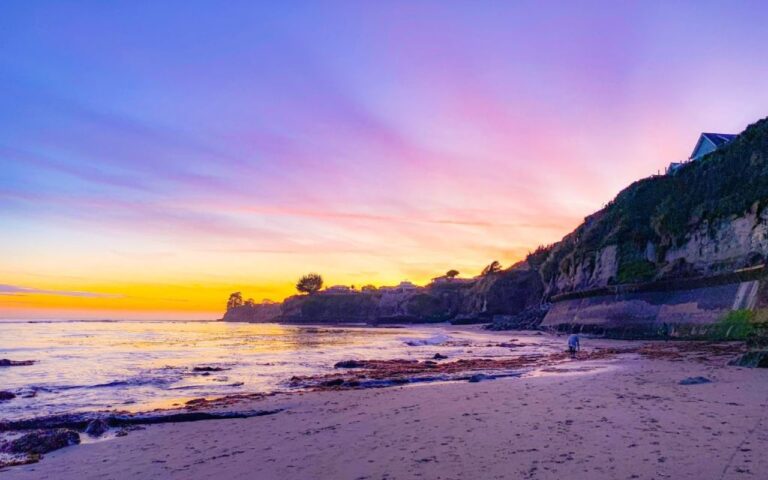
Imagine walking through a river, towering canyon walls rising high on both sides, with the sound of rushing water echoing around you. That’s The Narrows in Zion National Park—one of the most epic and unique hikes in the U.S. We visited In the summer so even during the time people recommend you is to hot for us was perfect and I am sharing everything I know.
If it’s your first time tackling this bucket-list adventure, don’t worry—I’ve got you covered. From what to wear to when to go, this beginner’s guide will help you stay prepared, safe, and make the most of your experience. Get ready to wade through the Virgin River, soak in jaw-dropping views, and have an unforgettable adventure!
Quick Guide of Narrows for Beginners
Don’t have a lot of time? Here’s a quick mini guide to Peru to help plan your epic adventure!
Where to Stay:
Staying close to Zion National Park ensures an early start for your hike. Here are some great options:
🏨 Springdale, UT (Closest to the Park Entrance)
– Cable Mountain Lodge (Great views & walking distance to the park entrance)
– Zion Lodge (The only lodging inside Zion National Park—book early!)
🏨 St. George, UT (More Budget-Friendly)
– Hyatt Place St. George (Comfortable stay & great for families)
– Best Western Plus Abbey Inn (Great amenities & breakfast included)
When to Visit:
– The Narrows can be hiked year-round, but conditions vary by season:
✅ Best Time: Late Spring (May-June) & Fall (September-October) – Comfortable water temperatures & moderate crowds
☀️ Summer (June-August): Warmer water but very crowded
❄️ Winter (November-February): Requires cold-weather gear but fewer people
🌊 Spring (March-April): Be cautious of snowmelt, high water levels and trail closures
Things to Do:
💦 Hike The Narrows :
🚶♂️ Take the Riverside Walk
📷 Photography Hot Spots – Wall Street, Mystery Falls, and Big Spring.
💰 How Much Does It Cost?
– Park Entrance Fee: $35 per vehicle (valid for 7 days)
– Gear Rentals (if needed): ~$30-$50 (neoprene socks, water shoes, & hiking pole)
– Shuttle to the Trailhead: Free with park admission (March-November)
What to Expect on Your Narrows Hike
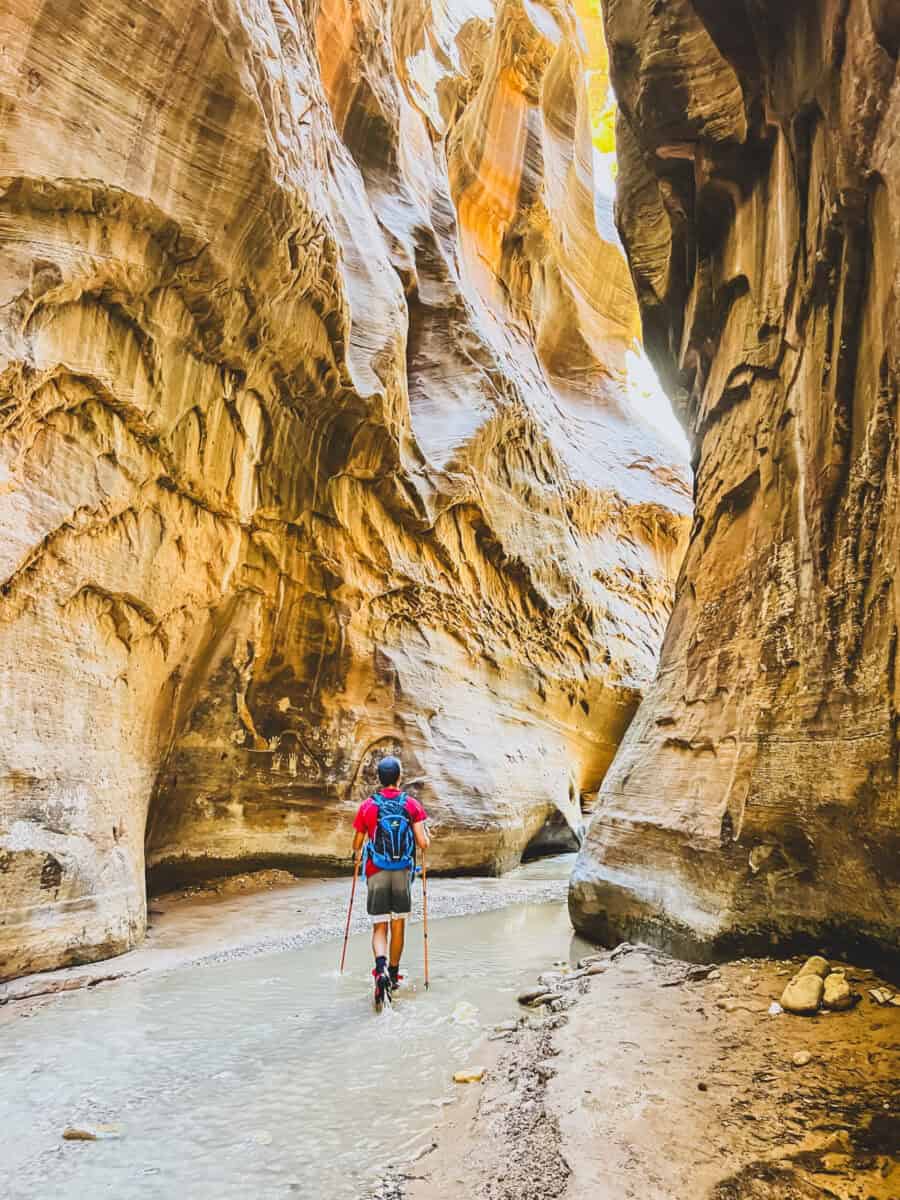
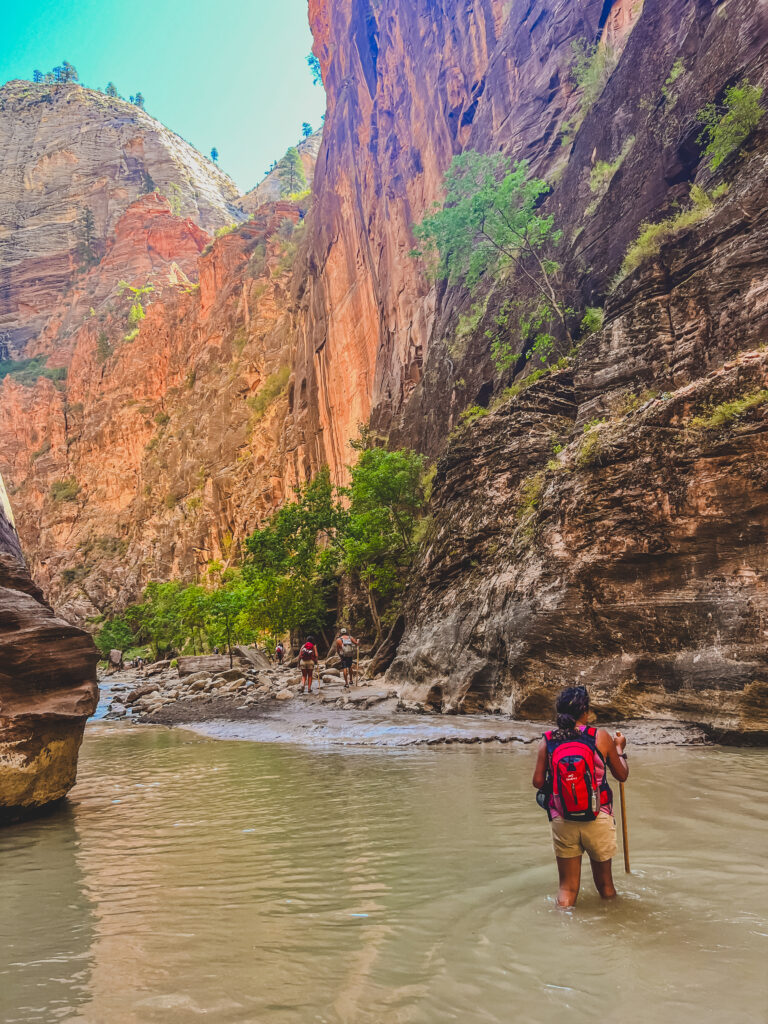
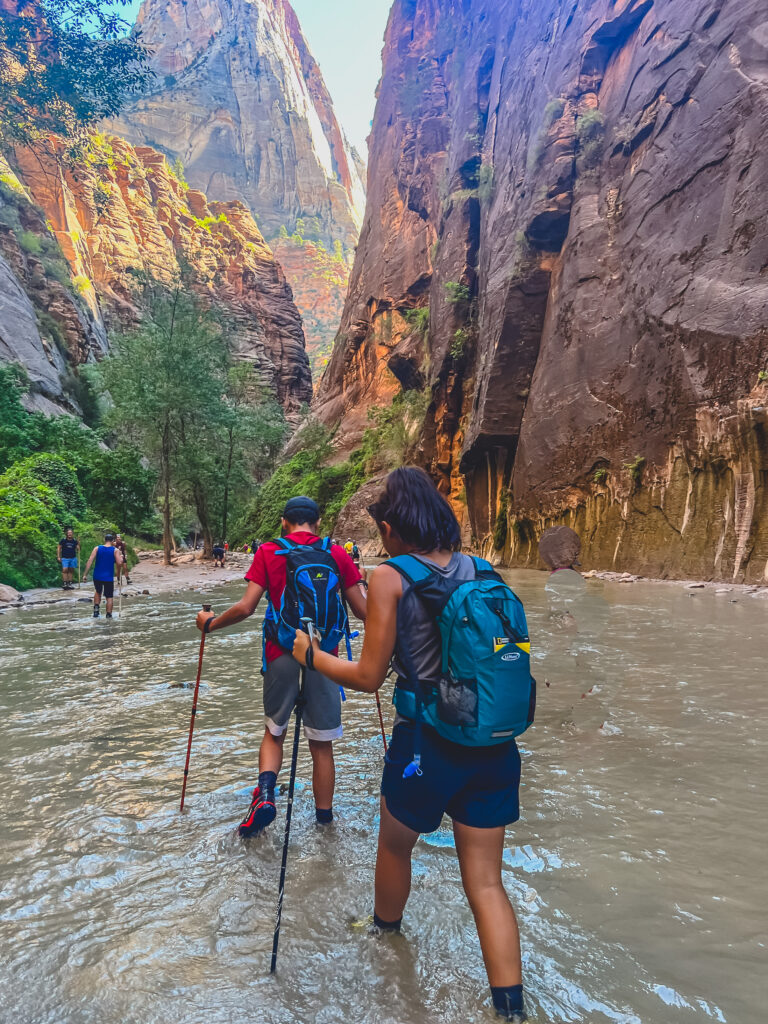
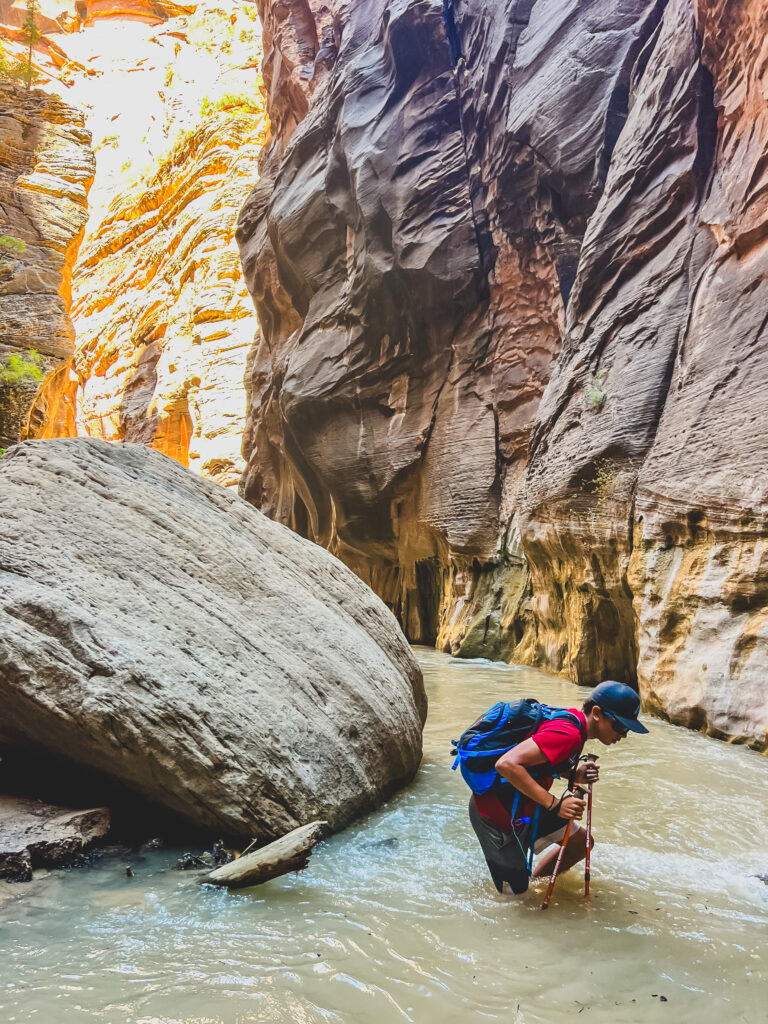
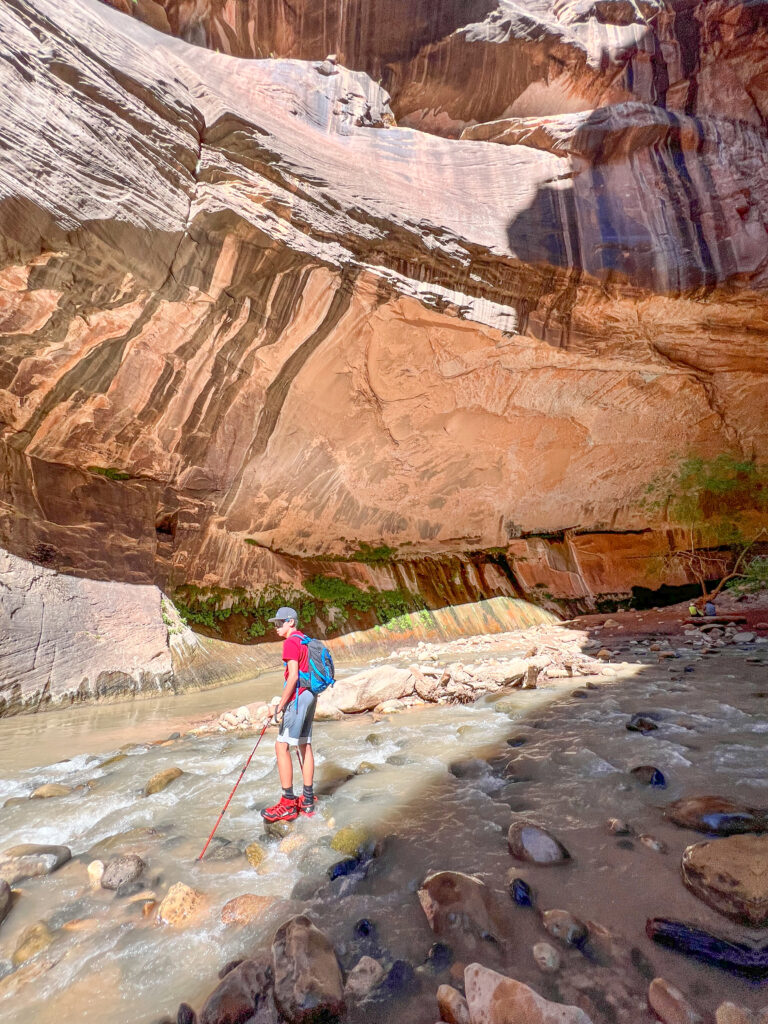
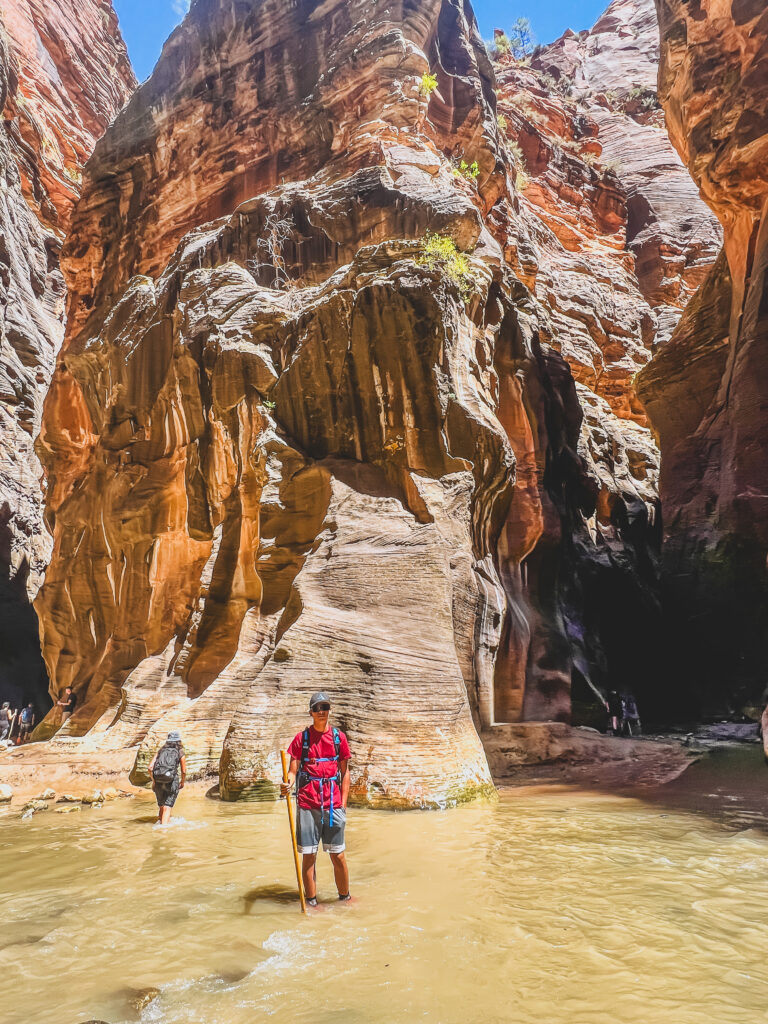
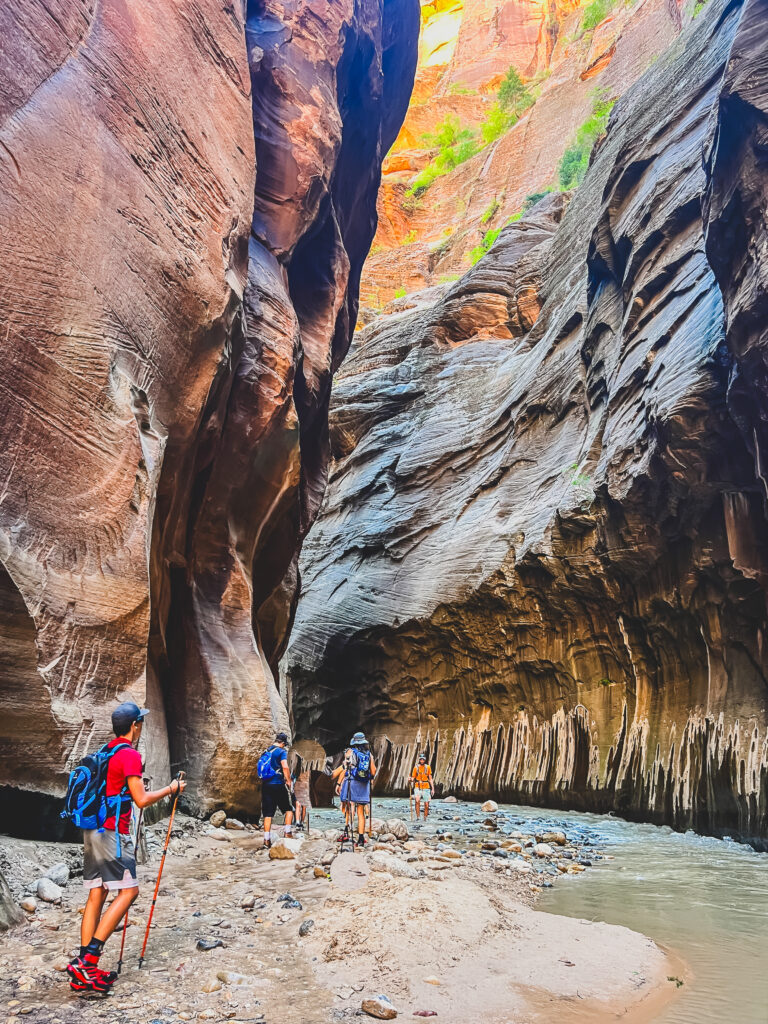
Picture this: You’re hiking through a slot canyon, but instead of a regular trail, you’re walking directly in the river—yep, The Narrows is one of the most unique hikes out there! With towering canyon walls soaring up to 1,000 feet high, and the Virgin River flowing beneath your feet, this is one adventure you won’t forget.
Depending on the season, the water depth can range from ankle-deep to waist-deep, so be prepared to get wet (and yes, that’s part of the fun!).
There are Two Ways to Hike The Narrows
✔️ Bottom-Up Day Hike (No permit needed) – This is the most popular route, where you start from the Temple of Sinawava and hike as far as Big Spring (9.4 miles round trip) before turning around. You can go as far as you’re comfortable!
✔️ Top-Down Through Hike (Permit required) – A more advanced option that covers 16 miles from Chamberlain’s Ranch to the bottom. If you’re up for the challenge, this one is an epic full-day or overnight adventure!
For first-timers, the bottom-up hike is the way to go—it’s more flexible, less demanding, and still delivers all the jaw-dropping scenery.
What You Need for Hiking The Narrows: Essential Gear Guide
Hiking The Narrows is an unforgettable experience, but having the right gear is key to staying safe, comfortable, and fully enjoying the adventure. Since you’ll be walking directly in the Virgin River, navigating slippery rocks and varying water depths, proper footwear and protective gear are must-haves. Here’s everything you need to pack before stepping into this bucket-list hike!
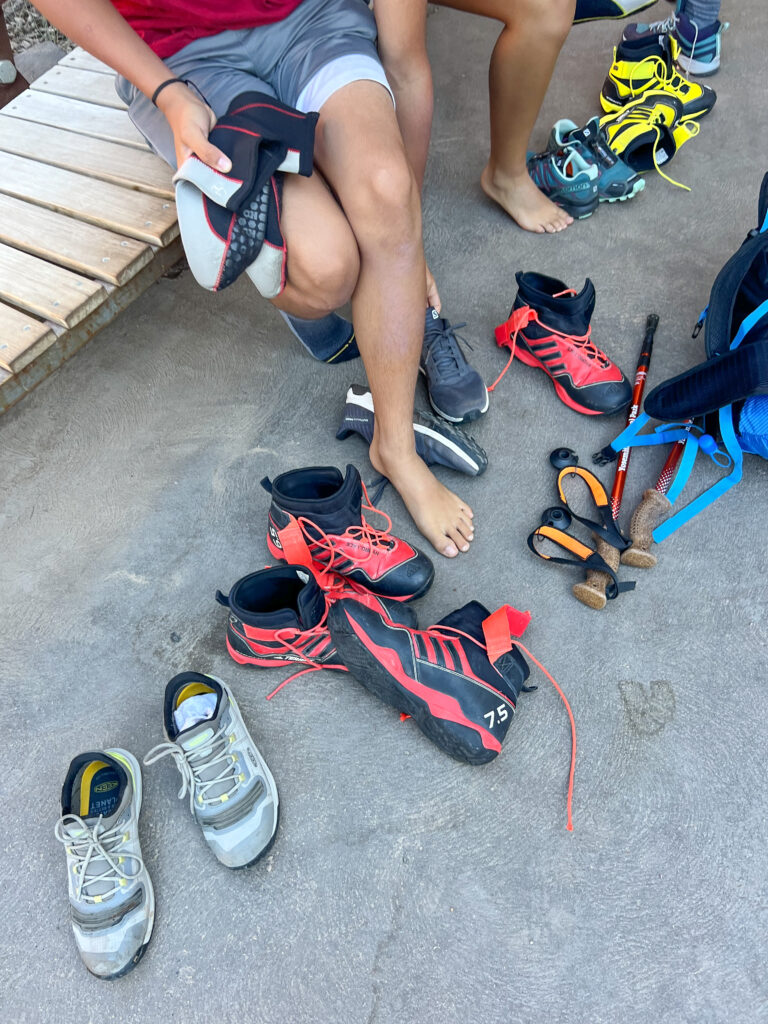
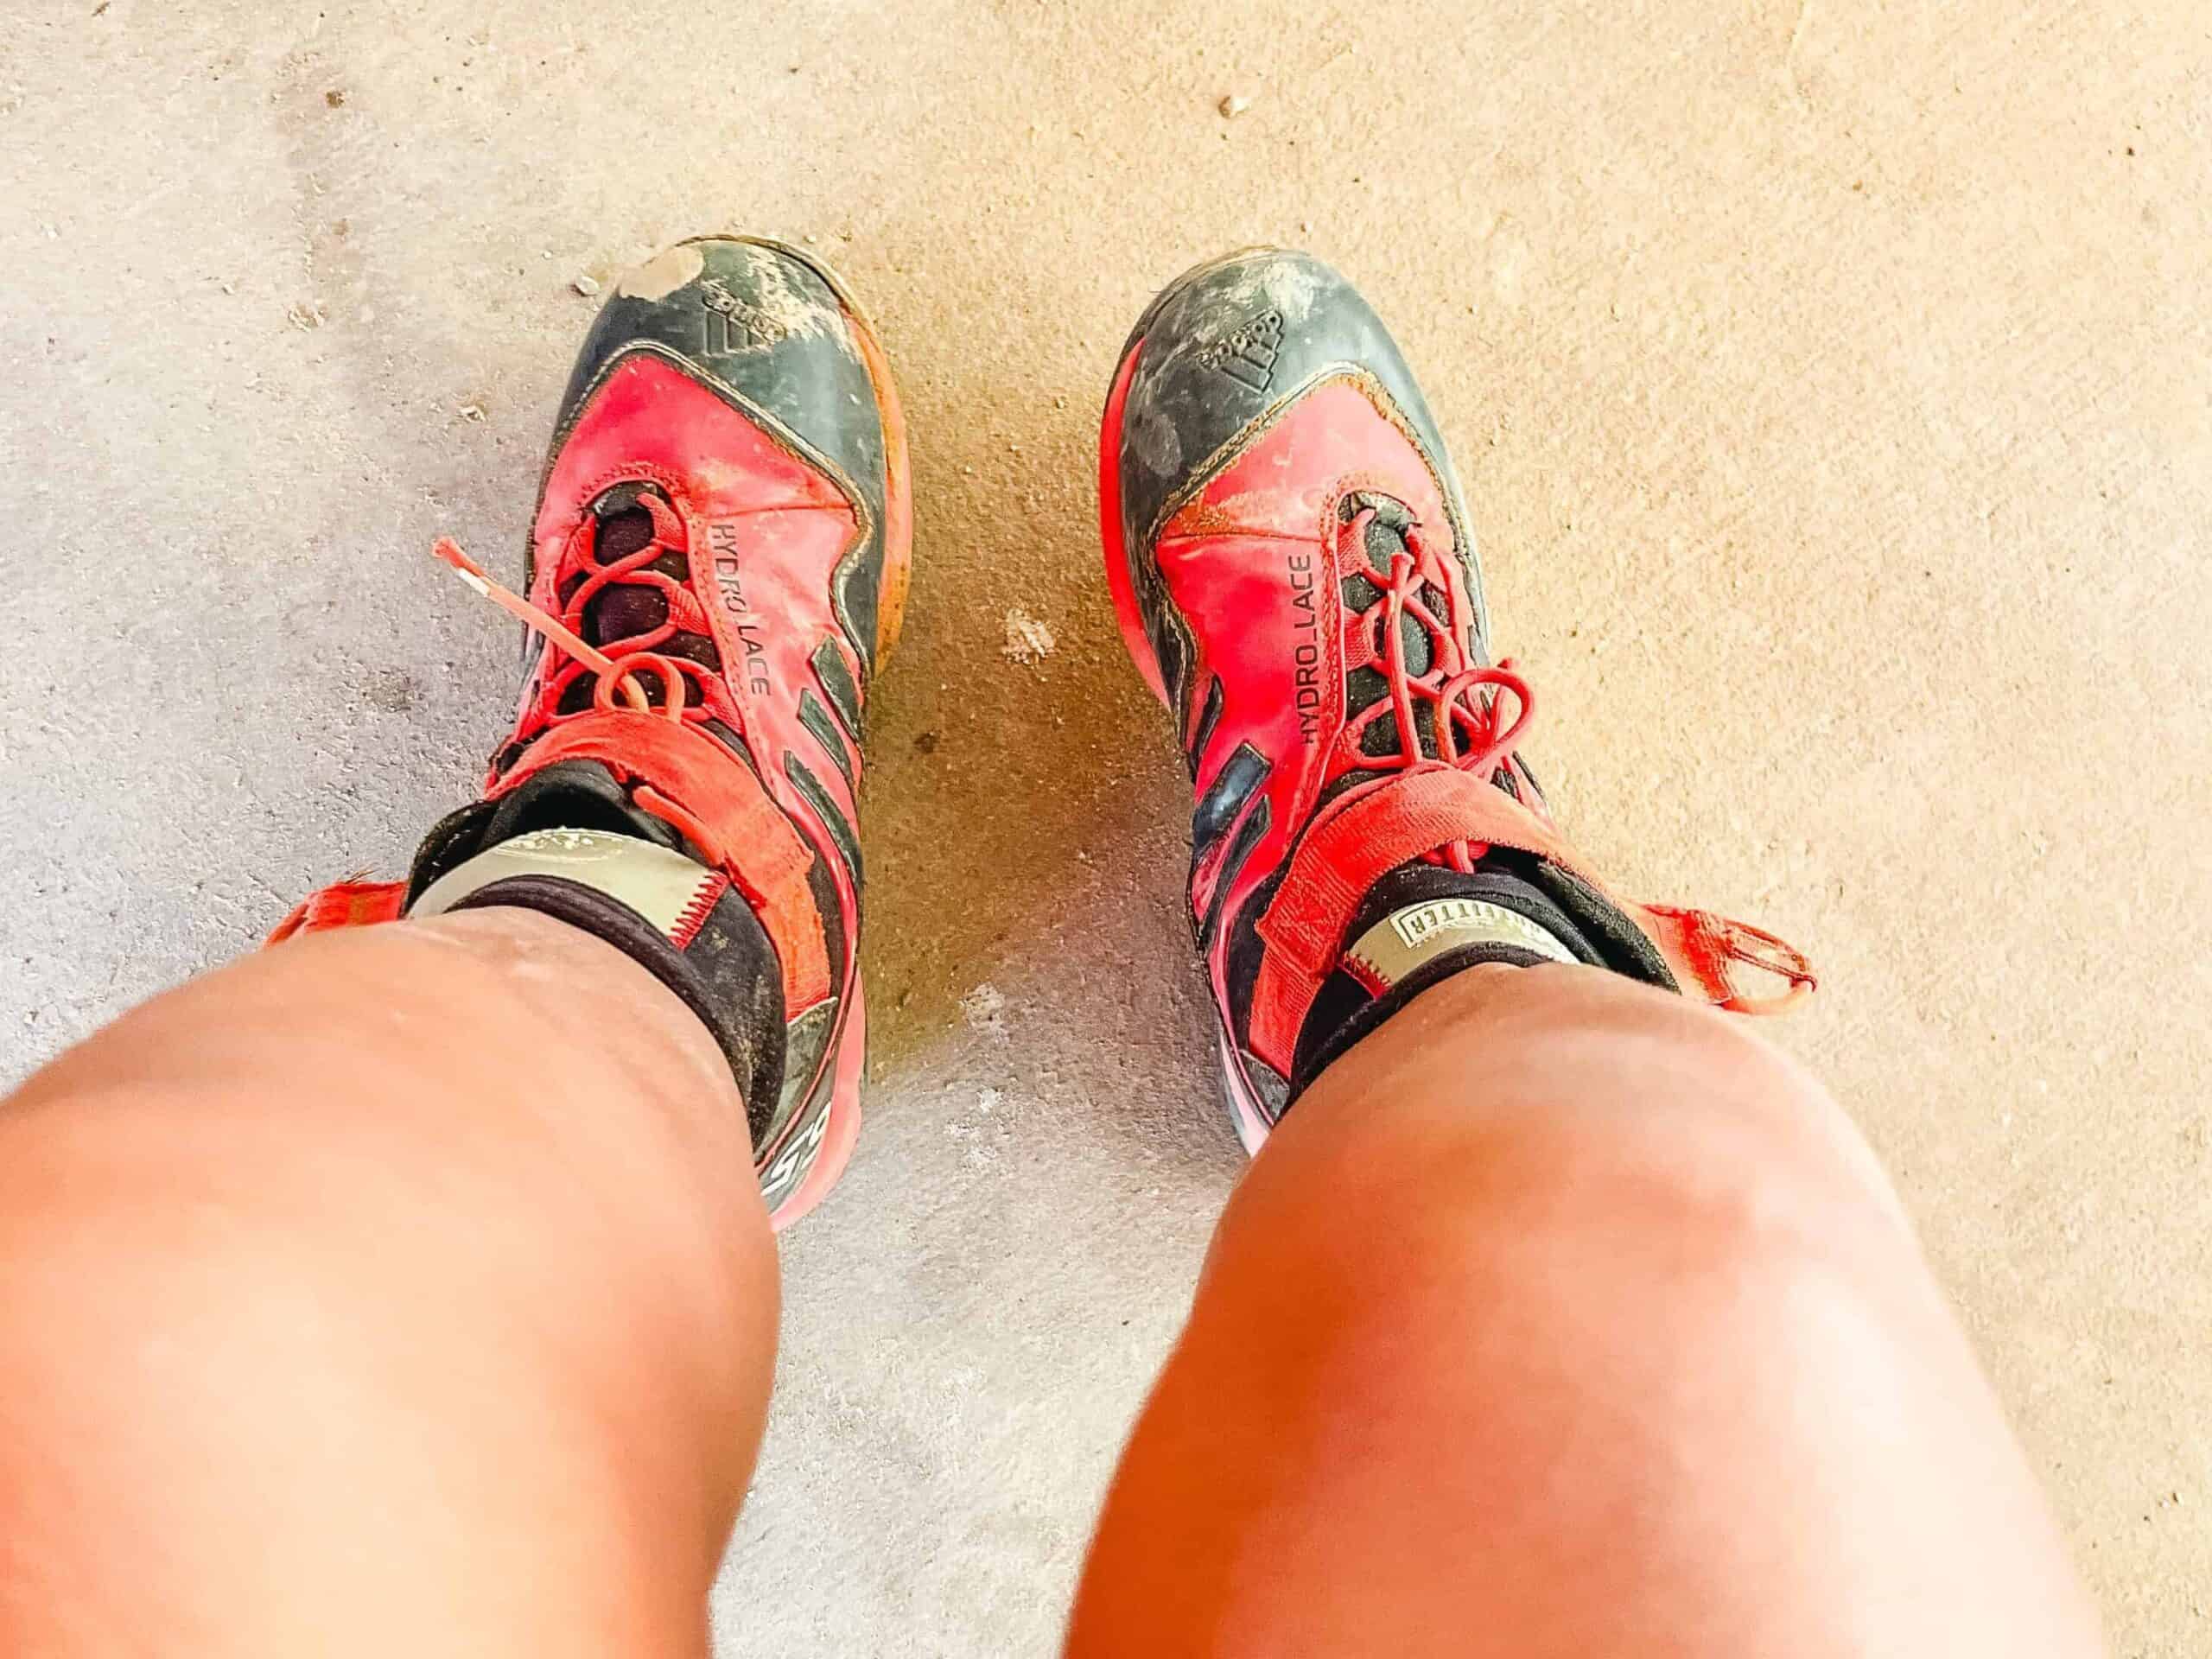
🥾 Footwear: The Most Important Choice
Since you’ll be hiking in and out of water, choosing the right footwear is essential:
✔️ Waterproof Hiking Boots or Canyon Shoes – Provide grip, ankle support, and protection from sharp rocks. Renting boots at Zion Outfitter is an option if you don’t own a good pair.
✔️ Neoprene Socks – These keep your feet warm in cold water and help prevent blisters.
✔️ Water Shoes (Budget-Friendly Option) – If you already have sturdy water shoes with grip and ankle support, they work too.
Pro Tip: Many hikers rent boots and neoprene socks as part of a package, which can be more affordable than buying new gear. That is what we did. package include trecking pole, sock and boots in winter you can rent a suit as well.
🦯 Stability & Balance: Trekking Poles Are a Game-Changer
✔️ Trekking Poles (Highly Recommended!) – The riverbed is rocky and slippery, and having at least one pole helps with balance, especially in deeper water.
✔️ Walking Stick (Alternative) – If you’re renting gear, a wooden walking stick is another great option.
Pro Tip: Don’t skip this! Having a pole saved me from slipping more times than I can count!
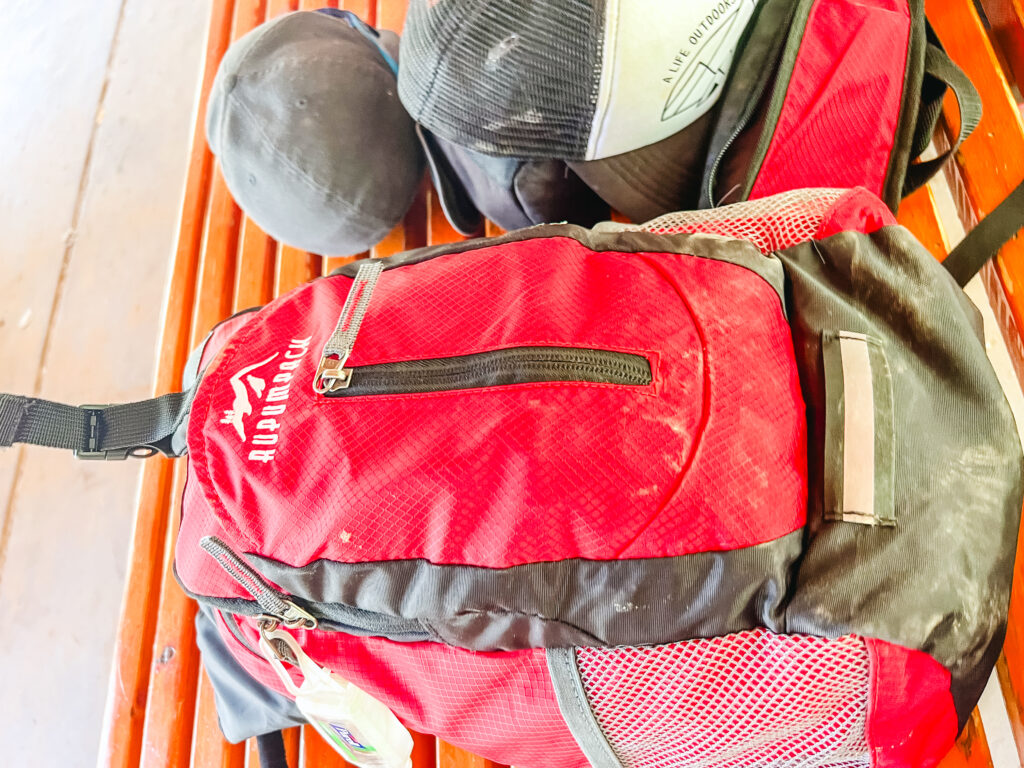
🎒 Packing Essentials for Your Day Hike
Since The Narrows is an all-day adventure, bringing the right supplies will keep you energized and prepared:
✔️ Waterproof Dry Bag – Keeps your valuables safe from water damage (phone, wallet, extra layers). I completely recomend it. I fall down and got my backpack wet.
✔️ Hydration Pack or Water Bottles – You’ll be hiking for hours—bring at least 2 liters per person.
✔️ Snacks & Lunch – Pack lightweight, high-energy snacks like energy bars, sandwiches, chocolate, or gummy candies.
✔️ Sun Protection – A hat, sunglasses, and sunscreen are a must—there’s little shade in the canyon! specially in summer
✔️ Phone Protection – A waterproof phone case is worth every penny.
✔️ Garbage Bag – Leave no trace! Pack out all trash.
✔️ Emergency Kit – A small first-aid kit (like the Hiker’s Mini First Aid Kit) is always a good idea.
Pro Tip: If you’re doing a longer hike, consider a water filter (like a LifeStraw) to refill safely from the river.
👕 Clothing: What to Wear
The Narrows’ water temperature varies depending on the season, so wearing quick-drying, moisture-wicking clothingis important:
✔️ Warm Weather (Spring/Summer)
- long-sleeve shirt for sun protection
- Quick-dry hiking shorts or leggings
- Swimsuit underneath for deeper sections
✔️ Cool Weather (Fall/Winter)
- Neoprene pants or waterproof hiking pants
- Fleece layer to stay warm
- Gloves & beanie for cold mornings
Pro Tip: Layers are key! Even in summer, canyon water can be cold—so avoid cotton, which stays wet and heavy.
Renting vs. Bringing Your Own Gear
If you don’t want to invest in specialized gear, you can rent everything in Springdale (the town right outside Zion). Most rental shops offer “Narrows Packages” that include:
✔️ Neoprene Socks
✔️ Canyon Shoes
✔️ Trekking Pole
Rental cost: Around $30–$35 per person for the day.
While reservations are not mandatory, you can make them on the website. You can collect your Narrows equipment on the morning of your hike or the evening before, from 3 pm to 7 pm (subject to availability). All equipment must be returned by 7 pm on the day of your hike.
It is advisable to make reservations in advance. Any equipment that has been reserved must be collected before 10:00 am. For Narrows equipment, it is possible to collect it on the morning of the hike or the evening before between the hours of 3pm and 7pm.
Pro Tip: Renting saves money if you don’t hike in water often! If you plan to do similar hikes in the future, buying your own might be a better investment.
Water Depth & What to Expect Hiking on the Narrows
We got very wet!!! The Narrows isn’t the same year-round—water levels change based on rainfall and snowmelt:
Shallow sections – Only ankle or knee-deep in summer. Deeper spots – Some areas can reach waist or chest-deep after heavy rain! Flash Floods – Always check conditions before hiking—flash floods are dangerous and can happen unexpectedly.
Pro Tip: Wear a swimsuit under your clothes just in case you have to wade through deeper sections!
Are You Ready for The Narrows?
Hiking The Narrows isn’t just a hike—it’s an experience. With towering canyon walls, rushing river waters, and epic views, it’s one of Zion’s most unforgettable adventures.
Whether you rent gear or bring your own, make sure you’re prepared, pack smart, and embrace the adventure. You’re about to have an EPIC hike!
What do you need?
- Hydratation Backpacks. I like this one because it fits more than juts water. There are small ones like this
- We also used eletrolyte and bars for snack.
- For survival purposes, we packed the Hikers Mini First Aid Kit .
- Capturing our adventure was made possible with the GoPro action camera .
- Our belongings were kept safe and dry in a waterproof bag .
Best Time for Hiking The Narrows? Here’s What You Need to Know!
So, you’re ready to tackle one of Zion’s most iconic hikes—but wondering when’s the best time to go? The truth is, The Narrows is open year-round, but your experience will totally depend on the season. Here’s what to expect:
Summer (June – August): I visited in August. This is prime hiking season—the water is warmer, the weather is hot, and you don’t need much extra gear. But heads up: it’s also the busiest time, so expect crowds (and get an early start if you want some solitude!).
Fall (September – November): This is one of the best times to hike The Narrows. The water is still manageable, crowds start to thin out, and the cooler temps make for a perfect hiking day.
Winter (December – February): If you’re up for an adventure, winter hiking here is magical. No crowds, peaceful vibes, and a unique experience—but you’ll need extra gear (like dry suits and neoprene layers) to stay warm.
Spring (March – May): This is a tricky time to visit because of snowmelt—which can cause high water levels and sometimes close the hike completely. Always check the river flow rates before heading out!
No matter when you go, always check the weather forecast and river conditions before your hike. The park closes The Narrows if the water levels get too high—so plan accordingly! flow exceeds 150 cubic feet per second (CFS).
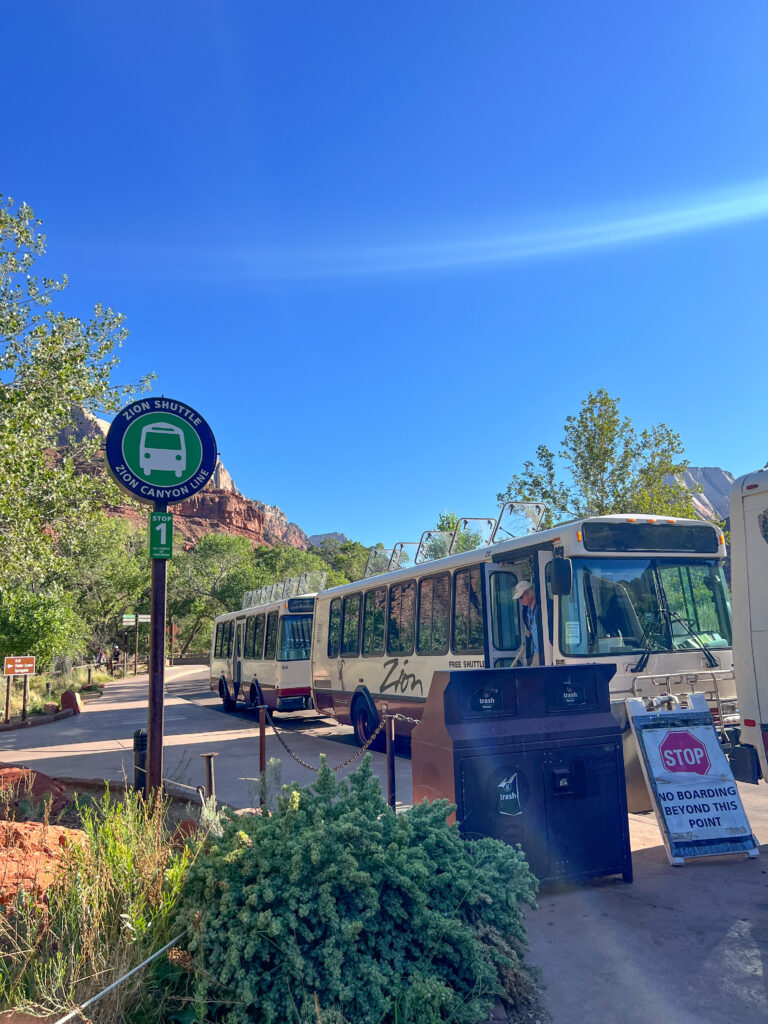
Getting to The Narrows Trailhead: What You Need to Know
Alright, so you’re pumped to hike The Narrows—but how do you actually get there?
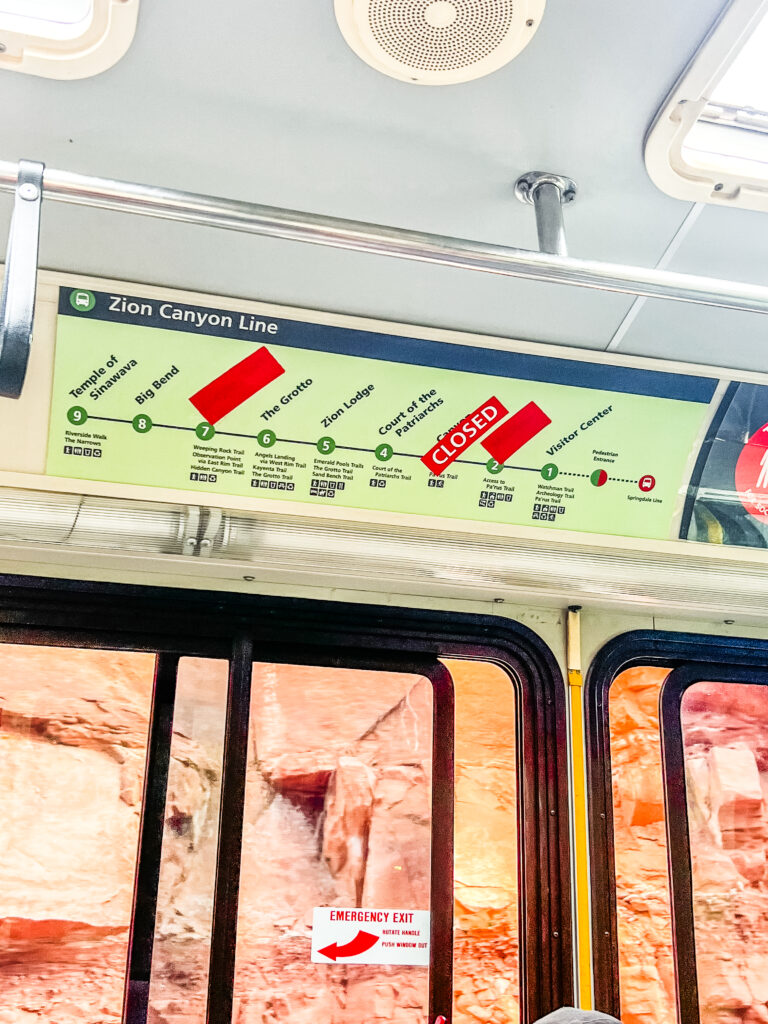
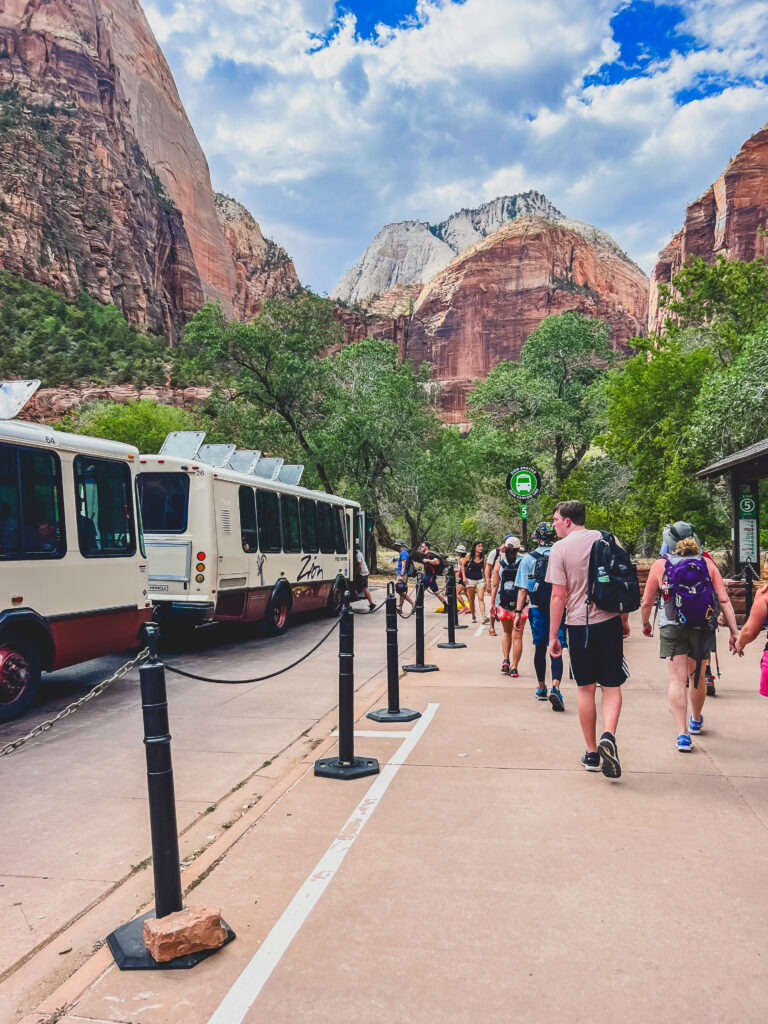
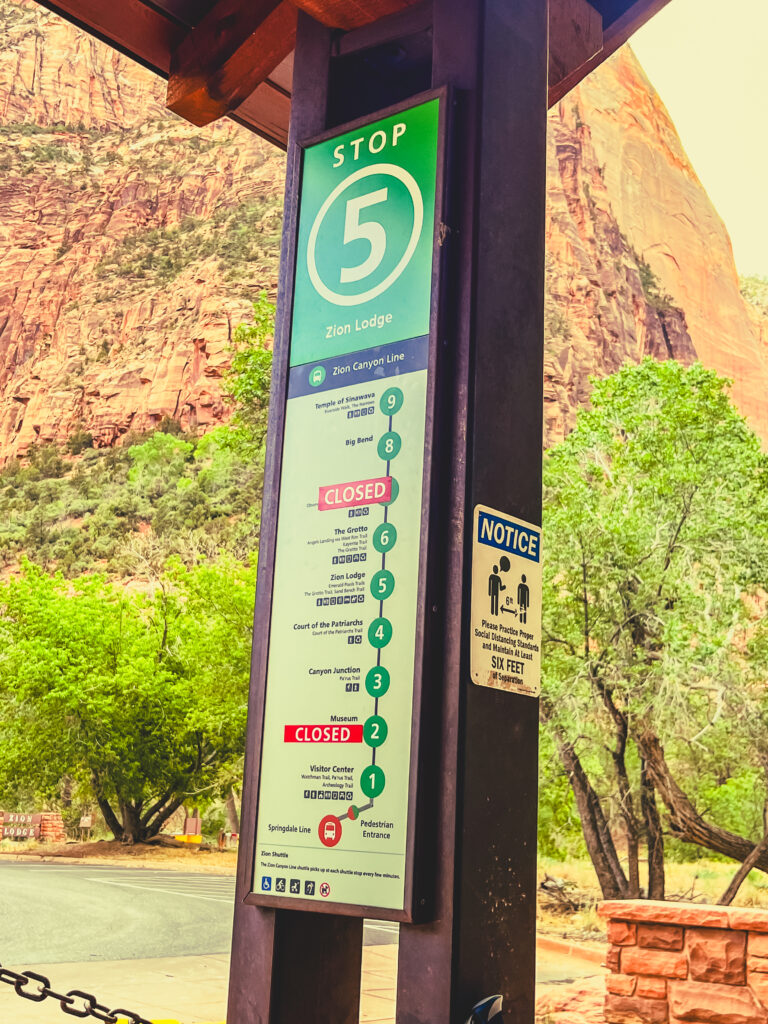
The trailhead is at Temple of Sinawava, the final stop on the Zion National Park shuttle. From March to November, private cars aren’t allowed on the Scenic Drive, so you’ll need to hop on the park’s shuttle system instead.
The lines and stations are clearly marked both at the station and on the bus, making it easy to navigate. You won’t miss your stop! As you can see in the pictures.
Here is how to Get to the Narrows Zion: Step-by-Step Breakdown
Here’s a breakdown of what you’ll experience from start to finish, so you know exactly what to expect before stepping into the river
Step 1: Catch the shuttle from the Zion Visitor Center and ride it all the way to Temple of Sinawava (Shuttle Stop #9).This location has an elevation of 334ft, which is not too high

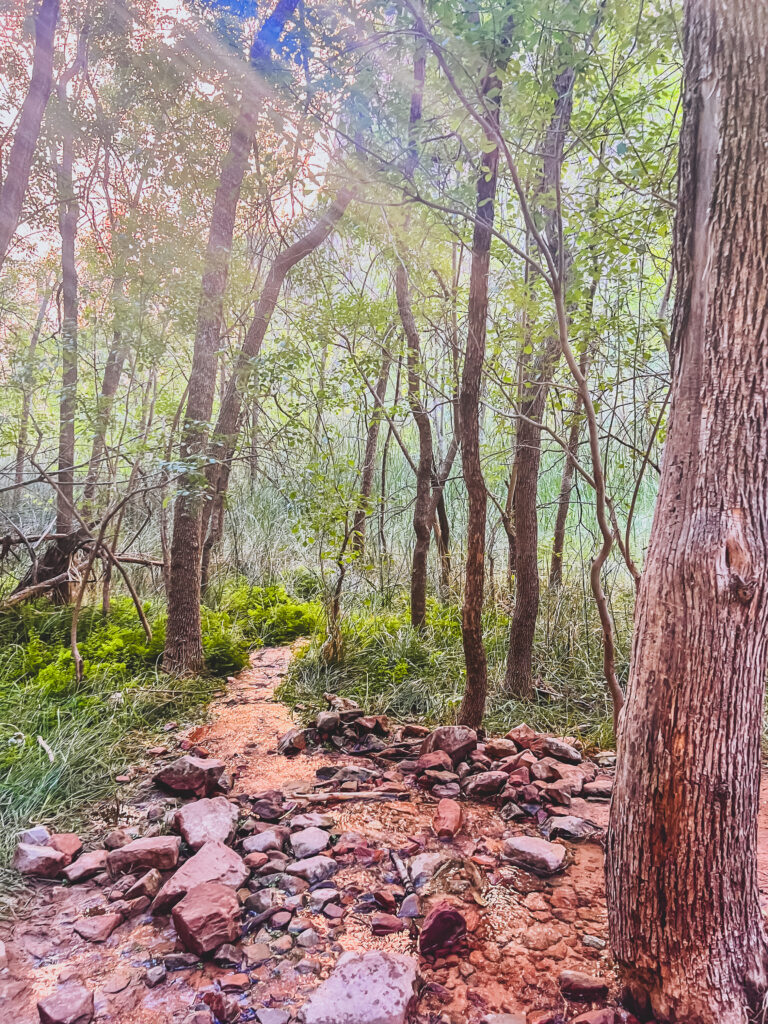
Step 2: Walk the Riverside Walk—a super scenic, easy 1-mile paved trail that leads to the entrance of The Narrows.
Start your adventure with the Riverside Walk, a scenic and easy 1-mile paved trail that serves as the perfect warm-up before entering The Narrows. This stretch runs alongside the Virgin River, offering beautiful views and a peaceful stroll. If you’re hiking with kids, older family members, or anyone who prefers to stay dry, this is a great turnaround point. Bonus: It’s wheelchair accessible!
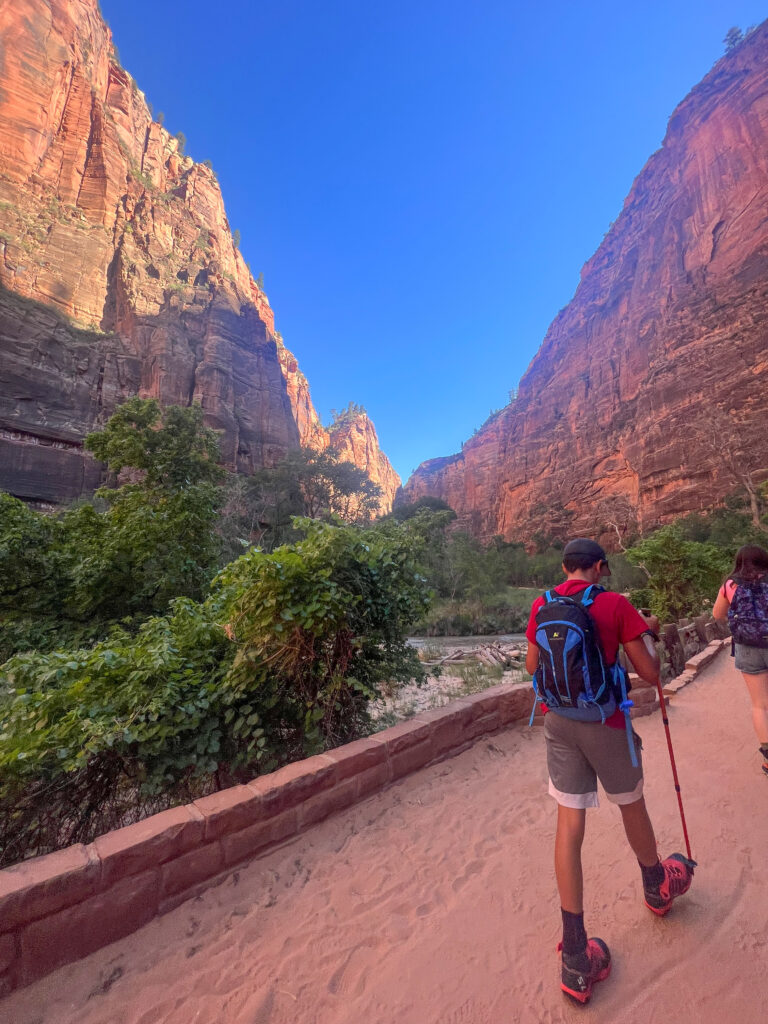
Step 3: Once you reach the river… your adventure begins! Get ready to start wading!
Entering the River & Finding Your Rhythm
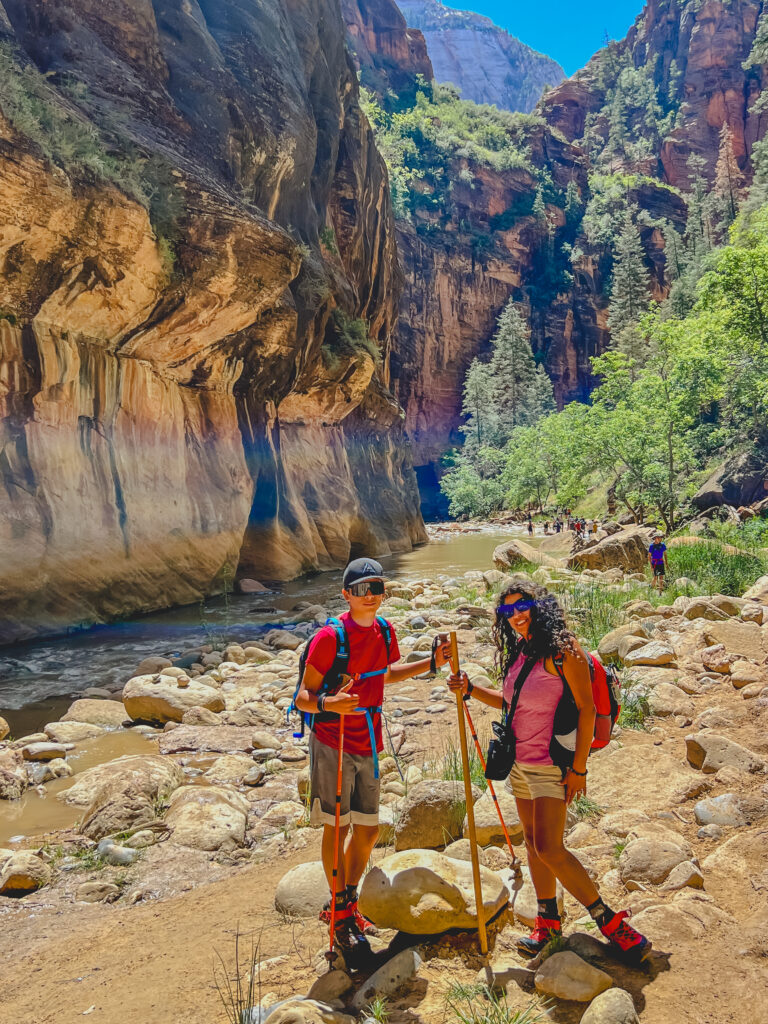
Once Riverside Walk ends, your real adventure begins! At this point, there’s no more traditional trail—you’ll be wading directly in the river. The canyon starts off wide and open, with small beaches and dry spots along the way where you can take breaks.
If you’re visiting outside of shuttle season (late fall to winter), you can drive your own car to the trailhead—just be aware that parking is limited.

Pro Tip: During peak season, shuttles fill up fast—so get to the Visitor Center early in the morning to grab a spot and beat the crowds!

Step 4: Reaching the Fork – Orderville Canyon or Wall Street?
About 2.5 miles in, you’ll hit a fork in the river:
👉 To the right – Orderville Canyon joins The Narrows. This side canyon is a bit narrower and can be fun to explore.
👉 To the left – You’ll continue on the main Narrows trail, where the canyon walls get even taller and closer together.
This section, known as Wall Street, is the most famous part of The Narrows—where the canyon narrows to just 20–30 feet wide with walls rising over 1,000 feet high. This is what most people come for and aim to reach before turning back.

For those intending to hike the entire 16-mile stretch of the Virgin River Narrows in one day, only one Wilderness permit will be required for the group on the chosen date of the trip.
Step 4: The Turnaround – Where to Stop?
Since this is an out-and-back hike, you can turn around whenever you start feeling tired. However, all bottom-up hikers MUST turn back at Big Spring, a 20-foot waterfall about 4.7 miles from the starting point.
Want to Hike the Full 16 Miles? Here’s What You Need to Know
If you want to hike The Narrows from top to bottom (all 16 miles in one day!), you’ll need a Wilderness Permit for your group on your chosen hiking date. This full-day trek is more demanding and requires advance planning.
⏳ How Much Time Should You Plan?
- Casual hikers: Most people spend 3–6 hours round-trip exploring Wall Street and turning back when ready.
- Full hike to Big Spring: Expect 8–10 hours round-trip.
- Top-Down (16 miles): This is an all-day hike that can take 12+ hours.
How to Hike The Narrows: What to Expect & How to Prepare
If you’re planning to hike The Narrows, get ready for an adventure unlike any other. There’s no traditional trail—instead, you’ll be walking directly in the Virgin River, wading through water, and navigating a stunning slot canyon with towering rock walls. It’s an experience you won’t forget!
How the Hike Works
Most hikers start their journey at Temple of Sinawava, the final stop on the Zion National Park shuttle. From there, you’ll take the Riverside Walk, a scenic 1-mile paved trail that leads to the entrance of The Narrows. Once you reach the river, you’ll step right in and begin your trek upstream before turning around and retracing your steps back to the shuttle stop.
For a day hike, the furthest you can go without a permit is Big Springs, making the round-trip distance 9.4 miles.
Our Experience: The Bottom-Up Hike
We did the Bottom-Up route, which is the most common way to explore The Narrows. After getting off the shuttle, we walked the 1-mile Riverside Walk before stepping into the Virgin River. From there, we made our way through the canyon, navigating slippery rocks, varying water depths, and some breathtaking scenery.
The full hike to Big Springs is 4.7 miles one way, and while it’s considered a moderate hike, it definitely requires good balance, endurance, and the right gear. We noticed that most young kids weren’t making it all the way, so if you’re bringing little ones, be prepared with proper footwear, trekking poles, and extra patience!
Keep in Mind You will get wet! Expect water levels to vary from ankle to waist-deep, depending on the season. The rocks are super slippery. Having hiking poles or a sturdy walking stick makes a huge difference. Plan your turnaround time wisely. Since you’ll be hiking upstream first, coming back will be much easier and faster.
Tips for a Successful Hike
- Start Early: The earlier you start, the fewer people you’ll encounter.
- Rent Gear if Needed: Local outfitters in Springdale offer rental packages that include water shoes, neoprene socks, and hiking poles.
- Check the Weather: Avoid hiking if rain is in the forecast due to flash flood risks.
- Know Your Limits: The hike can be strenuous. Turn back if you’re feeling tired or uncomfortable.
- Stay on High Ground: If water levels rise or you need a break, find high ground to rest.
Key Landmarks Along The Narrows Hike
As you make your way through The Narrows, you’ll pass several iconic landmarks that make this hike even more memorable. Here’s what to look out for along the way:
📍 1. Riverside Walk (1 Mile In)
This paved, scenic trail leads from Temple of Sinawava to the entrance of The Narrows. It’s an easy stroll, great for warming up before stepping into the river.
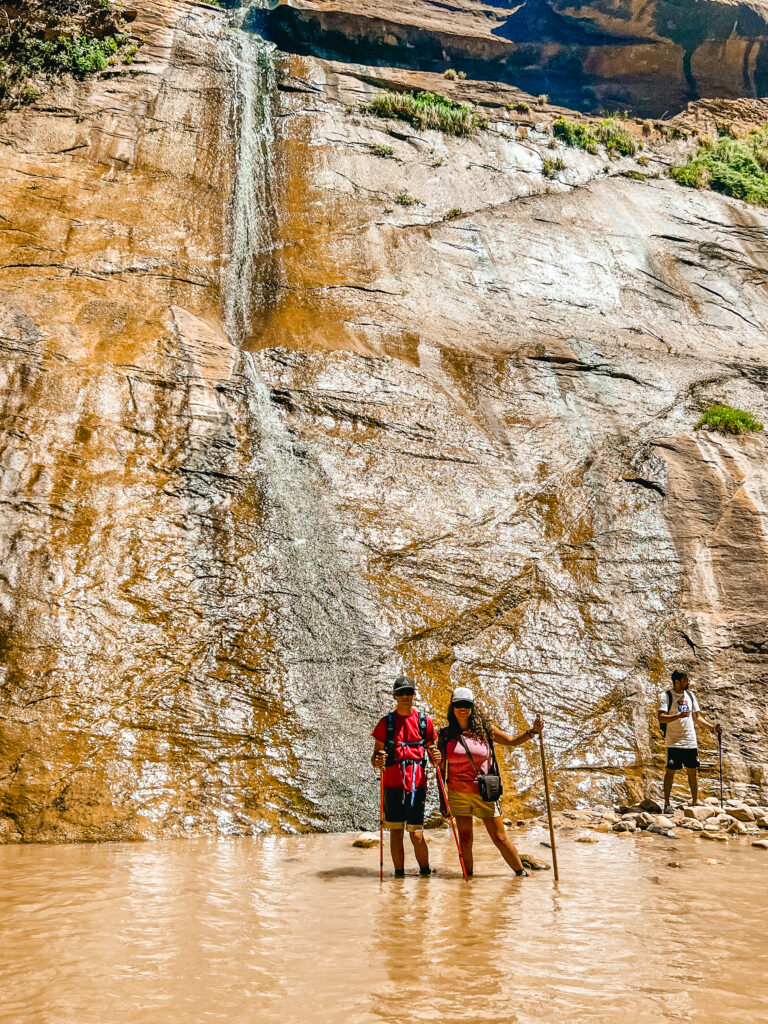
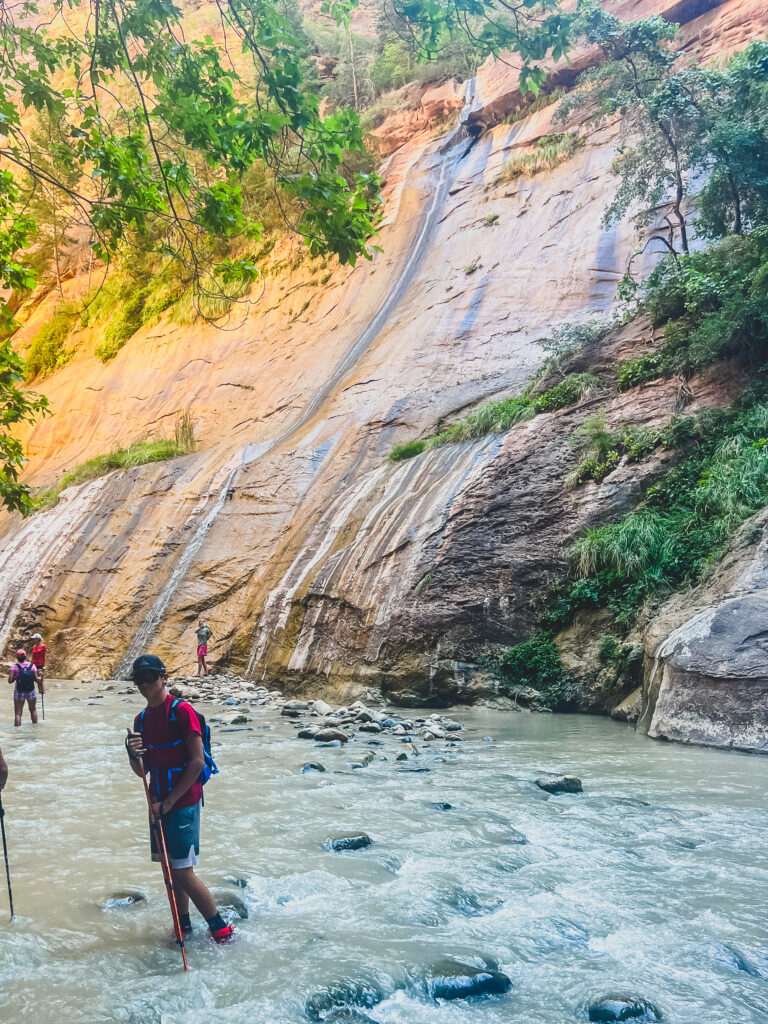
💦 2. Mystery Falls (1.4 Miles In)
A beautiful waterfall cascading down the canyon walls—one of the first major sights along the route.
⛰️ 3. Orderville Canyon (1.6 Miles In)
A narrow side canyon that adventurous hikers can explore. It’s less crowded and offers a cool detour if you’re up for it!
🛶 4. Wall Street (2.5 Miles In)
This is THE section everyone talks about—the canyon walls narrow dramatically, creating one of the most breathtaking spots in The Narrows.
🌿 5. Big Spring (3.6 Miles In – Turnaround Point for Bottom-Up Hikers)
A lush, scenic area with a freshwater spring, marking the furthest you can go on the bottom-up hike (without a permit).
Important Tips Before You Start
🚻 Use the restrooms at Temple of Sinawava—there are no facilities along the trail.
💦 Be prepared to get wet! The entire hike takes place in the river, so wear appropriate gear.
⏳ Turn back when you’re ready—this is an out-and-back hike, so you can go as far as you feel comfortable.Safety Considerations
- Flash Flood Risk: Always check the weather forecast before your hike. Flash floods can occur even if it’s not raining in the park.
- Water Depth and Temperature: Water levels and temperatures vary, so dress appropriately.
- Slippery Rocks: Take your time and use hiking poles to avoid slipping.
- Warning for Flashfloods: Be sure to monitor the weather and avoid hiking if rain is expected.
Hiking The Narrows is a bucket-list experience for many adventurers visiting Zion National Park. With proper preparation and the right gear, even beginners can enjoy this unique and breathtaking hike. Follow the tips in this guide to make your hike safe, fun, and memorable.
You might be interested in